使用在线IDE实践新技术
在线IDE具备无需配置基础环境,随时随地,任一设备,打开浏览器即可编写和运行程序的优势,遇到bug时也可以分享在线IDE环境请求他人帮助,以便对方更好的结合上下文、开发环境定位问题。
那如何使用在线IDE实践新学习的技术?我们以学习Web开发为例进行说明:
完整的Web开发可能是用Java或者Ruby实现后端接口,使用Vue或者React实现前端功能。但对于我们大一、大二,仅接触了编程语言C和C++,对网站开发感兴趣,想做一个网站实现某些功能的同学来说需要掌握的技术栈缺口还有点多。那仅掌握了C、C++编程语言的同学有没有在短时间(一个月)内学习和制作出一个网站呢?
答案是有可能的。C++ 中有一个 CGI 的库,让我们可以在C++的基础上构建一个公共网关接口,使得应用程序(称为 CGI 程序或 CGI 脚本)能够与 Web 服务器以及客户端进行交互,并配合基础的HTML,可以在短时间内学习和制作出一个网站。
相关资料可查看:菜鸟教程 C++ Web 编程。
配置 Web 服务器
Web服务器一般指网站服务器,是指驻留于因特网上某种类型的计算机程序,可以处理浏览器等Web客户端的请求并返回相应响应,也可以放置网站文件,让全世界浏览;可以放置数据文件,让全世界下载。最主流的三个Web服务器是Apache、 Nginx 、IIS。在这里我们选择使用Nginx。
配置步骤:
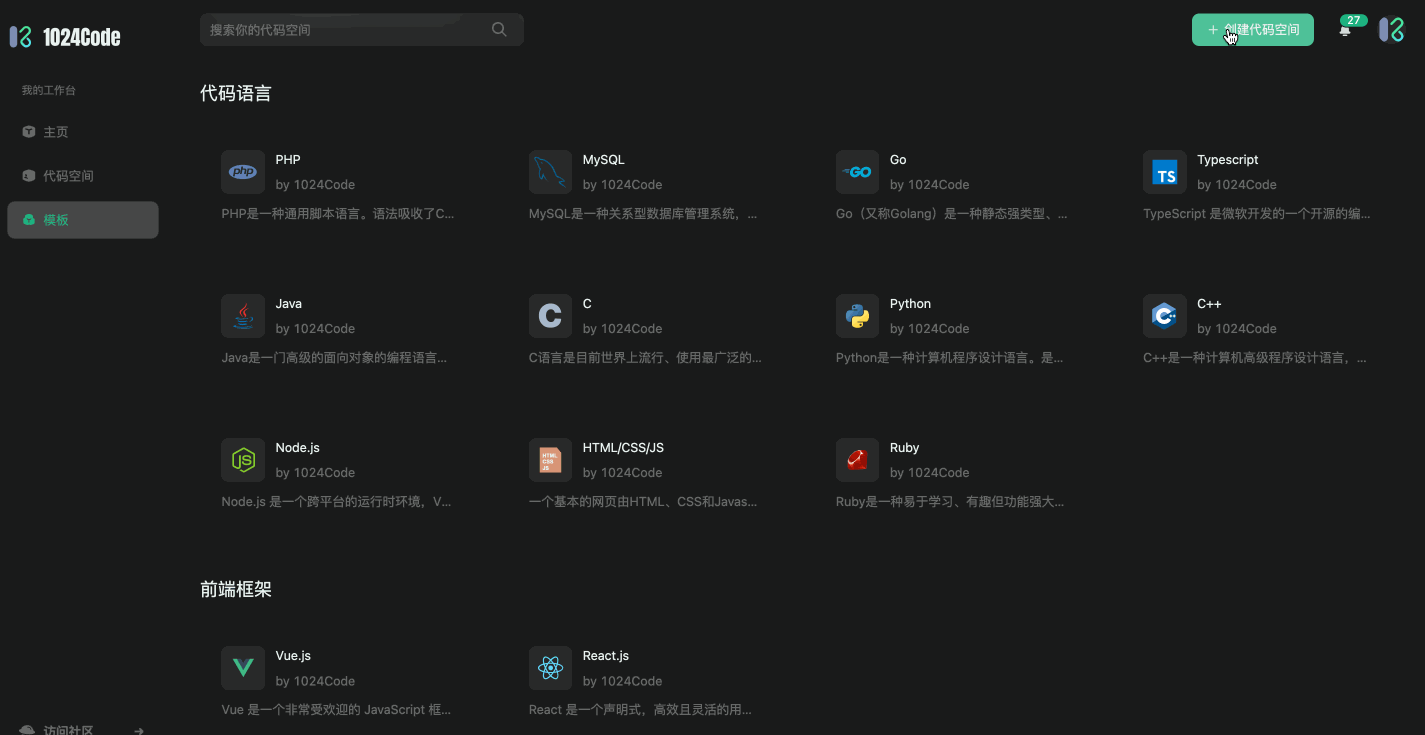
1、在线创建 C++ 代码空间
2、源码安装 Nginx
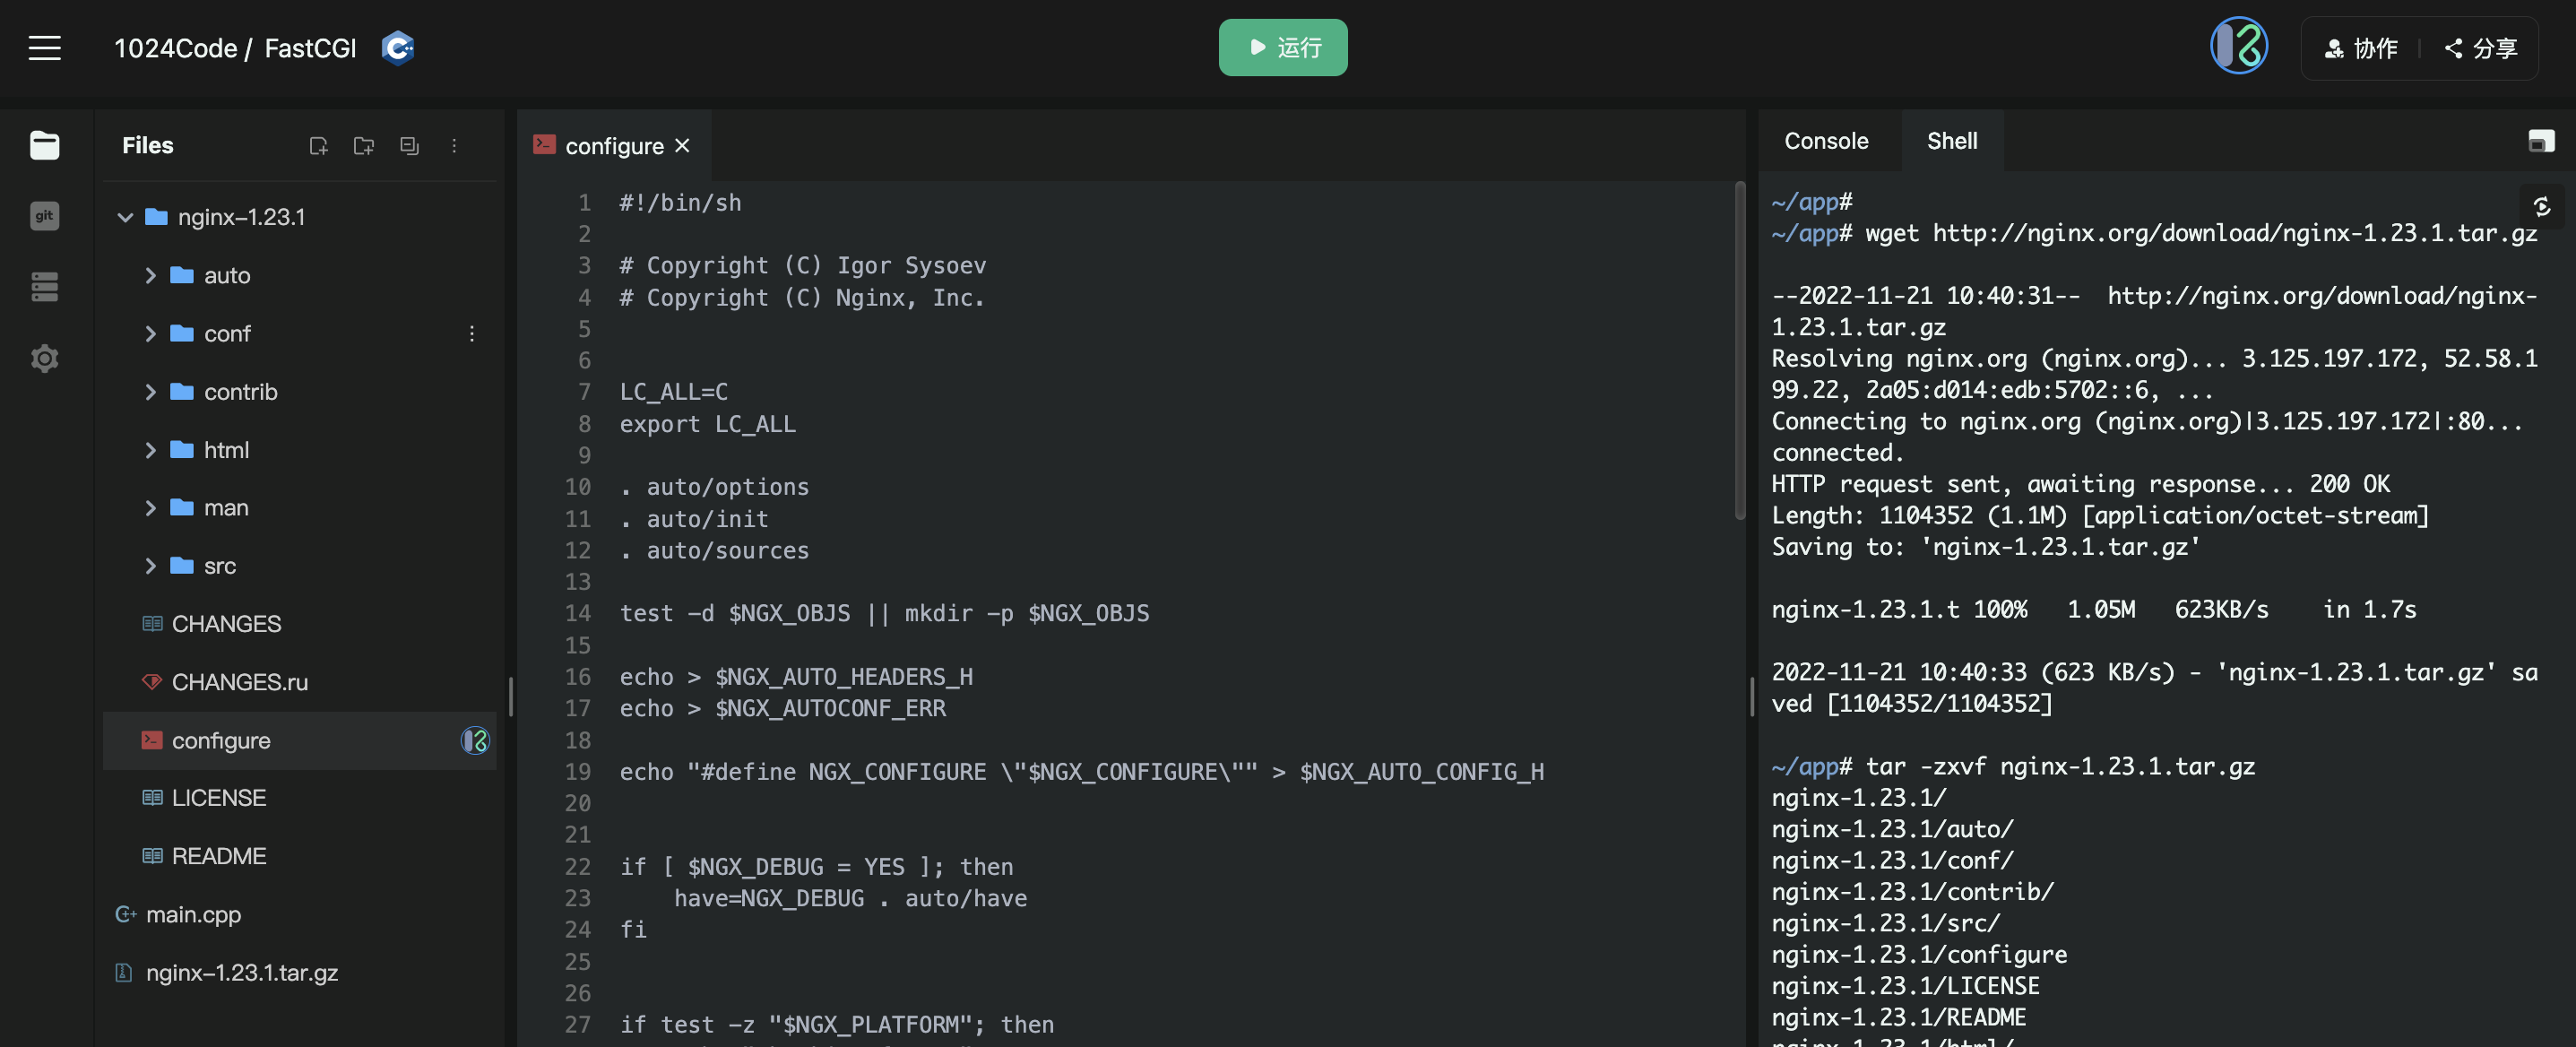
在代码空间的 linux shell 中执行下载和解压命令进行安装:
$ wget http://nginx.org/download/nginx-1.23.1.tar.gz
$ tar -zxvf nginx-1.23.1.tar.gz
3、在环境中添加Nginx需要的依赖项
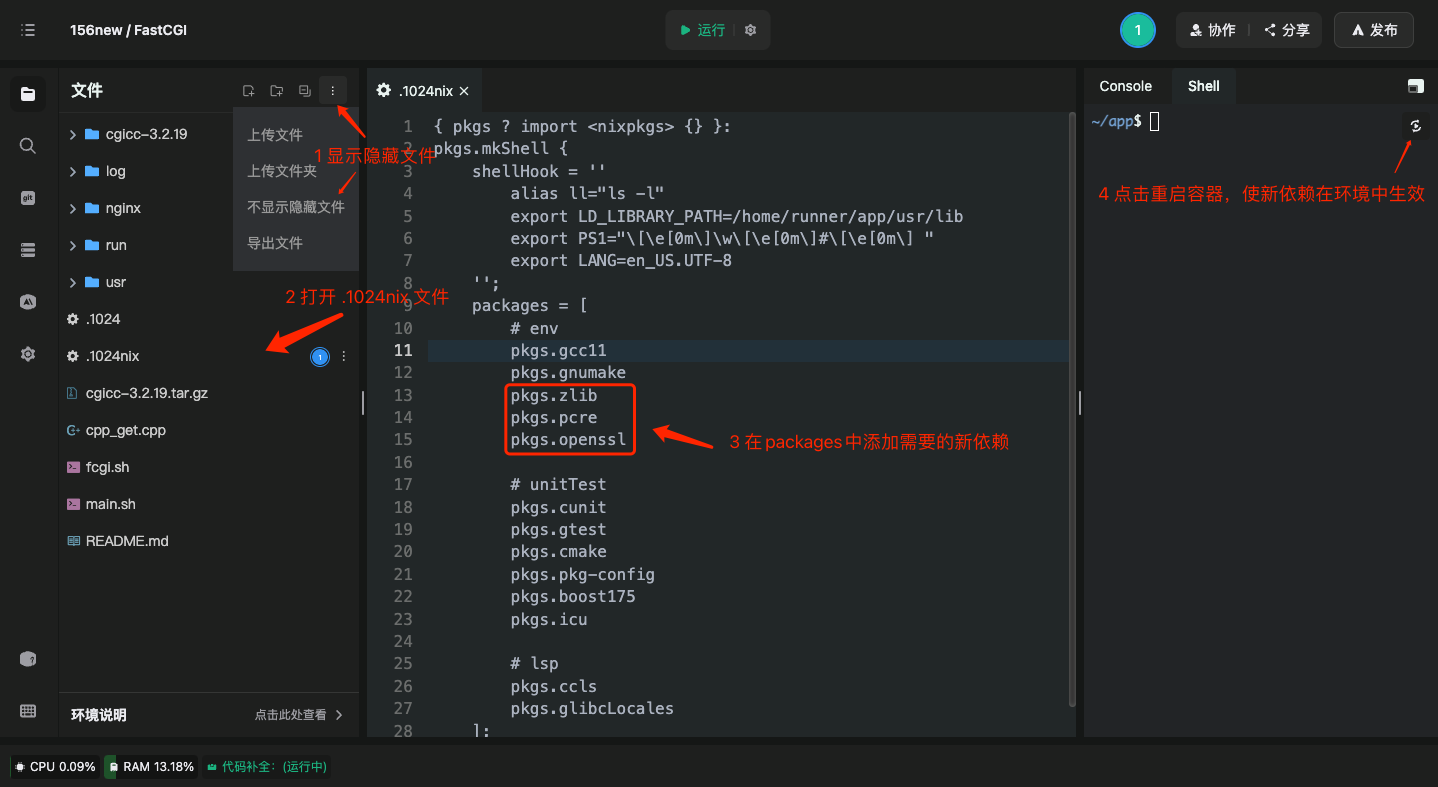
1024Code 使用 NixOS 对 IDE进行环境管理(不支持sudu和apt),我们需要通过修改代码空间的nix配置文件 .1024nix,在 .1024nix 的 packages 中添加新的依赖项:
pkgs.zlib
pkgs.pcre
pkgs.openssl
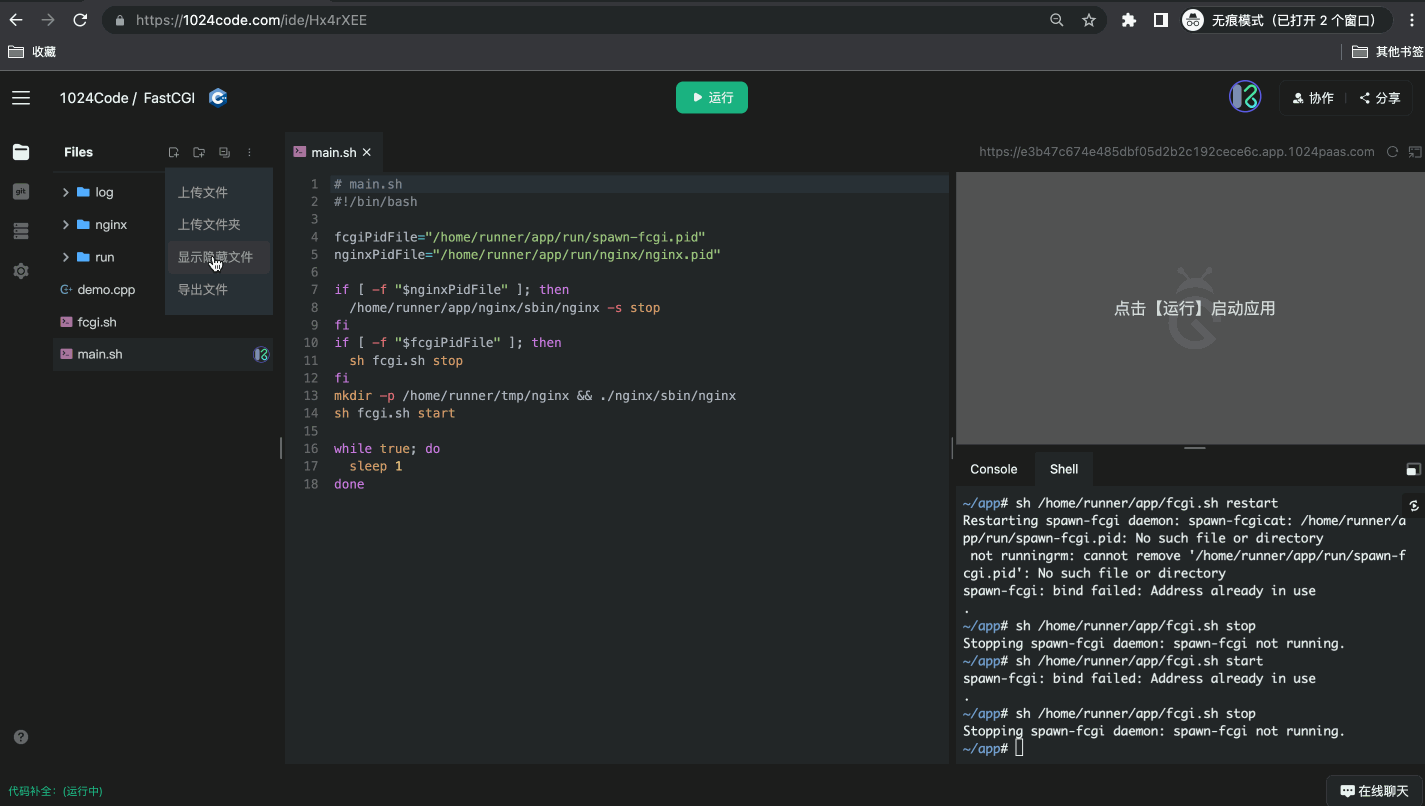
.1024nix 为默认隐藏文件,首先需要在文件树右上角的更多按钮时,选择“显示隐藏文件”,再点击 '.1024nix' 文件在编辑器中打开,在 packages 中添加上述几个新的依赖项参数。
然后,点击重启容器按钮,让该依赖在环境中生效。
4、通过 configure指定 nginx的安装路径
$ mkdir -p /home/runner/app/tmp/nginx
$ cd nginx-1.23.1
$ ./configure \
    --prefix=/home/runner/app/nginx \
    --pid-path=/home/runner/app/run/nginx/nginx.pid \
    --lock-path=/home/runner/app/lock/nginx/nginx.lock \
    --error-log-path=/home/runner/app/log/nginx/error.log \
    --http-log-path=/home/runner/app/log/nginx/access.log \
    --with-http_gzip_static_module \
    --http-client-body-temp-path=/home/runner/app/tmp/nginx/client \
    --http-proxy-temp-path=/home/runner/app/tmp/nginx/proxy \
    --http-fastcgi-temp-path=/home/runner/app/tmp/nginx/fastcgi \
    --http-uwsgi-temp-path=/home/runner/app/tmp/nginx/uwsgi \
    --http-scgi-temp-path=/home/runner/app/tmp/nginx/scgi

5、编译 nginx
$ cd nginx-1.23.1
$ make && make install

编译成功后,可以将之前下载解压的nginx-1.23.1文件夹删掉了(编译后生成了nginx文件夹,nginx-1.23.1文件夹无用了)
更多信息可查看:在1024Code上通过Nginx配置C++的CGI程序实例
安装FastCGI
FastCGI 是增加了一些扩展功能的CGI,描述了客户端和Web服务器程序之间传输数据的一种标准。我们同样可以上述方式修改nix配置文件 .1024nix 来为环境添加以下新的依赖项:
pkgs.fcgi
pkgs.fcgiwrap
pkgs.spawn_fcgi
编写并运行第一个CGI程序
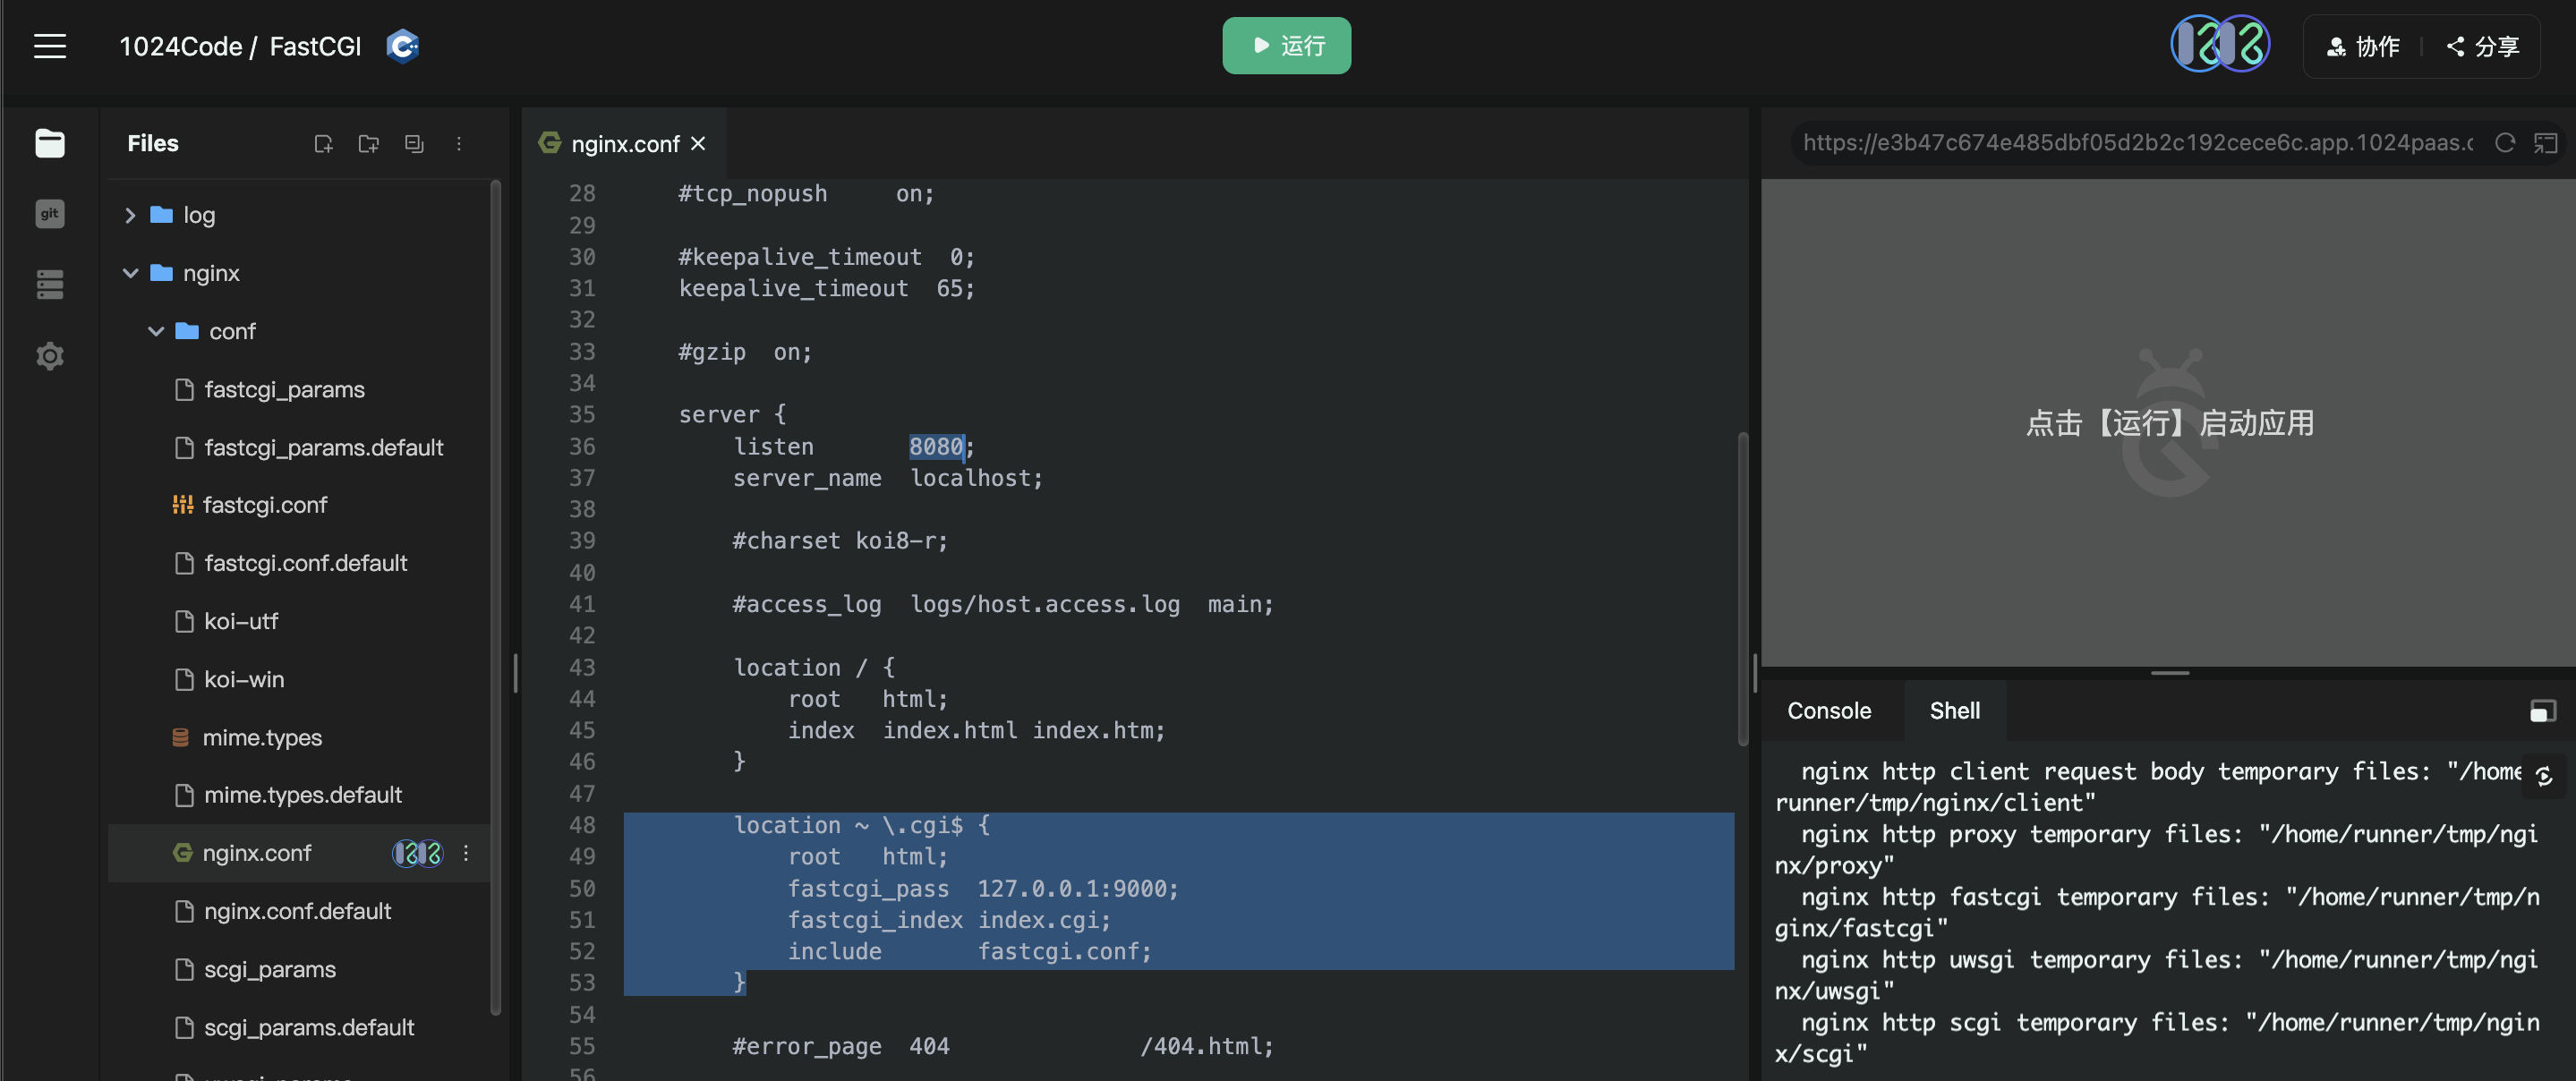
1、打开 nginx/conf/nginx.conf 文件,修改服务监听端口为8080,并添加对 cgi 的解析:
# ...
http {
   # ...
    server {
                listen       8080;
        # ...
        location ~ \.cgi$ {
            root   html;
            fastcgi_pass  127.0.0.1:9000;
            fastcgi_index index.cgi;
            include       fastcgi.conf;
        }
        # ...
    }
}
2、启动 fcgiwrap
$ spawn-fcgi -f fcgiwrap -p 9000

3、创建一个 cpp 文件,写一个 CGI Demo程序
// demo.cpp

#include <stdio.h>
#include <stdlib.h>

int main(void)
{
    int count = 0;
    printf("Content-type: text/html\r\n"
        "\r\n"
        "<title>CGI Hello!</title>"
        "<h1>CGI Hello!</h1>"
        "Request number %d running on host <i>%s<i>\n",
        ++count, getenv("SERVER_NAME"));
    return 0;
}
4、编译 Demo 程序,启动nginx,页面访问测试
在shell中使用g++命令编译,并发送可执行文件到 html 下
$ g++ demo.cpp -o /home/runner/app/nginx/html/demo.cgi -lfcgi
启动nginx
$ /home/runner/app/nginx/sbin/nginx
新标签页打开浏览器窗口,在地址栏中添加/demo.cgi尾缀,访问该页面

5、优化启动命令
目前 fcgiwrap 只有启动命令,如果重启还需要通过 ps 参考对应进程号,在通过 kill 干掉。那么我们是否可以通过shell,弄一个类似 nginx 的这种模式呢?如下:
5.1 创建 fcgi.sh 文件
# fcgi.sh
#! /bin/sh

DESC="spawn-fcgi daemon"
NAME=spawn-fcgi

BIND_HOST=127.0.0.1
BIND_PORT=9000

DAEMON_PIDFILE=/home/runner/app/run/spawn-fcgi.pid

d_start() {
$NAME -a $BIND_HOST -p $BIND_PORT -f fcgiwrap -P$DAEMON_PIDFILE
}

d_stop() {
kill -9 $(cat $DAEMON_PIDFILE) > /dev/null 2>&1 ||echo -n " not running"
rm $DAEMON_PIDFILE
}

case "$1" in
start)
        d_start
        echo "."
        ;;
stop)
        echo -n "Stopping $DESC: $NAME"
        d_stop
        echo "."
        ;;
restart)
        echo -n "Restarting $DESC: $NAME"
        d_stop
        sleep 1
        d_start
        echo "."
        ;;
*)
        echo "Usage: $SCRIPTNAME {start|stop|restart" >&2
        exit 3
        ;;
esac

exit 0
5.2 fcgi.sh 文件创建好后,我们在 shell 里执行以下命令来启动和停止 fcgiwrap 了:
#启动
$ sh /home/runner/app/fcgi.sh start
#停止
$ sh /home/runner/app/fcgi.sh stop
#重新加载
$ sh /home/runner/app/fcgi.sh restart
5.3 然后,我们可以基于pid文件是否存在来判断 fcgiwrap 和 nginx 是否运行,就可以做一个启动命令,绑定到 运行 按钮下。
# main.sh
#!/bin/bash

fcgiPidFile="/home/runner/app/run/spawn-fcgi.pid"
nginxPidFile="/home/runner/app/run/nginx/nginx.pid"

if [ -f "$nginxPidFile" ]; then
  /home/runner/app/nginx/sbin/nginx -s stop
fi
if [ -f "$fcgiPidFile" ]; then
  sh fcgi.sh stop
fi
mkdir -p /home/runner/app/tmp/nginx && ./nginx/sbin/nginx
sh fcgi.sh start

while true; do
  sleep 1
done
5.4 修改运行命令为 "sh main.sh"(在 .1024 文件中),点击运行按钮一键启动 nginx、 fcgiwrap
Demo 程序代码空间
其它 FastCGI 实例
https://1024code.com/codecubes/gUd10C4 《FastCGI Get方法实例》
https://1024code.com/codecubes/3aqy0Wu 《FastCGI 文件上传功能实例》